![]() 2792
2792
9 Easy Steps to Launching Your First Website in 2022
![]() 5 min read
5 min read
![]() 2792
2792
![]() 5 min read
5 min read

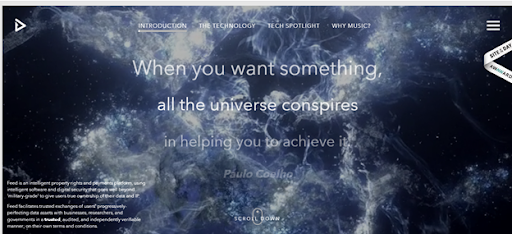
If you were to google search and type the best web designs, you would find some gorgeous designs.
For instance, this award-winning Feed Music Website. When I open this website, I feel it has put me in a state of trance. Through the blend of animation and video, this site immerses me in an engaging rather meditative experience.
From hand-made soaps to your local grocery store, every venture has a website. There are even websites designed for cat lovers.
I guess I have got you here- ‘There’s a website for cats and my business doesn’t have one?!’
Before you have a change of mind and go back to believing that your business is doing well offline, so there’s no need, you are being reckless.
I am serious!
59% of the global population are active internet users as of July 2020.
Are you connecting with everyone globally? A website will help you reach customers all over the world, thus helping you expand your business.
Now the next question you will ask is ‘I do not know how to create a website, and I can’t afford a professional web designer’.
That is why we are here with a complete guide to help you build a website from scratch!
Ready?
Let’s go…
Read also: Best Web App Ideas to Make Money in Future
Having a clear idea about why you are doing what you are doing; can lead to significant progress in both the short-term and long-term.
Are you a newly published writer who wants to promote your book using a website? Do you want a website to get more clients for your freelancing business? Do you want to sell home-made cakes online? Determining the purpose will help you formulate a clear strategy and achieve your goals. Secondly, you will have a story to tell your viewers which could pique their interest in knowing you and your services more.
Your brand name is the unique identity that says everything about your business- services, values, etc. So, while deciding the name, put in the same amount of effort you might put while naming your child or your dog.
A good domain name:
We suggest creating a short yet memorable name that gives a clear impression of your business—for example, Google.com, Hubspot.com, etc. A rule of thumb is to avoid complex words, avoid numbers and hyphens, avoid unnecessary confusion, make sure it is easy to pronounce and easy to spell, choose an eye-catchy name. You can take the help of domain generators like Name Mesh, NameStation, Wordoid, DomainHole, and more.
You also need to decide your top-level domain (TLD) which is the suffix at the end of your domain name, such as .com, .net, or .biz. Most often people use .com because it is easy to remember. You can even go for .net or .org. Also, don’t forget to give value to your domain and protect it with a DMARC report.
While you can get a free domain but if you want to look professional and credible, then go for a paid one. Once you decide the name, you can purchase and register it on Namecheap, or GoDaddy or you can get it from your web hosting provider about which we will talk in the following steps.
Website platforms are the crux of any business which works as a foundation of your website. There are website platforms like Weebly, WordPress, Webnode, Mozello, etc. are available that help you create a robust website.
The question is, which is the best one for your business?
WordPress is a popular platform with 60% of content management share. It is a free and open-source builder that comes with powerful SEO plugins.
There is a debate going on between WordPress v/s Wix. The biggest advantage of Wix is that it is free. However, a fun fact- Wix uses WordPress for their blogs.
We recommend doing proper research before choosing a platform for your website. For more help, you can consult the eCommerce development company to give you a smooth start.
After deciding the name and the website platform, the next step is to find a space to rent your address/URL. Here comes the role of a hosting plan. Investing in a good web hosting for your business increases website load time, gives better security, affects SEO, and supports long term plans for expansion.
Hosting does not appear on the front end to your visitors but that does not mean you do not pay any heed to it. WPX hosting is necessary to have a successful online presence and will save your site from crashing during high traffic as your website grows.
Which one is the best for me?
If you are just entering the web hosting world, then shared hosting will serve you right. But it doesn’t guarantee a spike in website traffic. Consider features like price, storage, site performance while choosing a shared web hosting.
Gradually, you can shift to indian VPS system, which stands for Virtual Private Server. VPS hosting is suitable for fast-growing sites and includes monitoring, security, and CDN services, storage with high-speed SSDs, and more.
High-performing sites need dedicated hosting where users have complete control over security systems, operating systems, load balancers, and more.
Here’s a list of popular Web Hosting Platforms:
You would want to create multiple web pages that have a clear purpose and support the goals of your business. If you’re wondering how to create a website from scratch, this is a crucial step to understand.
Let’s see what web pages you can add to your website.
Home Page: it is the first web page that visitors will see. Make sure it is visually appealing and rich in content.
About Us: here is where every information about your business, mission, vision, etc will go.
Contact Page: a page that allows visitors to contact you.
Blog: a listing of your blog posts.
Service Page: a page about the services you offer.
Product Page: if you have an eCommerce store, this page is for you.
Make sure that every page has good content, quality images, and a clear call to action.
Once the architecture of your website is ready, you can start working on the fun part i.e. logo, theme, fonts, etc. You might think what has a logo and colors to do with brand identity. All these aspects play a vital role in telling your story by reinforcing your brand. For instance, green represents nature, health, peace, and so on. That is why all-natural products or eco-friendly businesses tend to use green colors. This is one of the most important elements of website creation, so to get some new inspiration make sure to check leaders in the branding industry like any branding agency in San Diego.
Similar to colors, font style is important. Fonts like Arial and Helvetica indicate professionalism and seriousness. Therefore, white-collar businesses will choose such classic fonts. On the other hand, funky fonts like GoodDog or Amatic can add a playful touch to your brand.
A logo is central to your brand identity design. It is a visual element that speaks volumes about your brand. It is up to you what kind of logo you wish to create. You wish to choose just the initials like CNN or HP, or you want an abstract logo or something that is funky yet minimalist. Whatever you choose, make sure it reflects the nature of your business, the colors are well planned, typography and design are on point, it is simple and unique.
Use online logo design tools like Renderforest to enjoy innovative AI capabilities and create your logo in a few clicks. The platform’s logo maker can instantly transform your business ideas and make an eye-catching logotype to reflect your brand’s personality. You can also stop by Renderforest’s website templates to develop your website with a responsive web layout. It will save you time, energy, and money!
You have web pages ready. The next step is to add killer content to communicate with the audience. See to it that the content is engaging, relevant, and provides value to the readers.
Some tips that might help you:
When we talk about website content, it is necessary to throw some light on SEO. Search engine optimization is the process of growing the quality and quantity of website traffic by increasing the visibility of a website or a web page to users of a web search engine. Tweaking your website content can have a dramatic impact on ranking, improves user experience, increases conversion rate, serves as a long-term marketing strategy, improves page speed, and the list is endless.
Visitors are likely to look for some amazing posts of your niche on your site. Before your website goes live, see that you have 3-4 pieces of high-quality content published. You can write about your business journey and mission, informational blogs of your industry that include tips, FAQs, how-to, etc.
‘But I have still not launched the site…’
Do you wish a super successful launch? Then you have to invest some time in pre-launch marketing. The aim of this step is to increase the excitement of the audience so that they are more likely to stick around during and after the launch.
You can market your website by making a ‘coming soon’ announcement on social media platforms. If you use WordPress, you can download and install a plugin like EZP Coming Soon Page or Easy Coming Soon to promote. Start networking with people of your industry and tell them about your website.
At this stage, develop a pre-plan of your future marketing program. Decide once you launch your site, how are you going to reach out to people, what platforms will you be active on, what posts will you share, etc.
Now it’s time to make your website live. But before that do not forget to test your website for usability. Check if the links are working properly if it’s working on mobile devices and different browsers, proofread the content of the site, do a speed test, and so on.
Congratulations, you just figured out how to launch your first website. Further in the journey, always remember that your website is the window of your business. Keep it fresh, keep it exciting.
All product and company names are trademarks™, registered®, or copyright© trademarks of their respective holders. The use of them does not imply any affiliation with or endorsement by them.


